Showing posts with label finished quilt. Show all posts

Thursday, December 19, 2013

Shoofly quilt

This quilt was made entirely from scraps I already had.
I didn't use a pattern, just started making a bunch of shoo fly blocks.
It measures approximately 65x80

I love the traditional look and the small print fabrics.

a view from the back

and I stippled it all over.  I did this on my regular sewing maching (viking) and it turned out fabulous!

Then it goes into the box to never be seen again. 
I picked an ornament through http://www.uaidutah.org/ for christmas so this is one of the presents i'm giving to a young man through there program.
Thanks for stopping by!

Sunday, January 27, 2013

Finished!

Introducing my flying geese quilt:
I quilted this on my home machine using the straight line technique.

Instead of pinning for ever I used this quilt basting spray. It turned out well, I was very impressed, there was only one area where it puckered.
Right there in the middle but it doesn't bother me too much. Its on the back side.
Heres a little snapshot of the corners...they are my favorite.

When the corners match up perfectly you feel like you've done something right!
The colors are plain and not my favorite however I made this for my nephew. He is 8 so I didn't want it to be boyish or even girly but still kinda cool. I think I pulled it off?
 click here to see the previous post of this quilt

And here is the picture of the whole quilt.
It measures 50x70. Its already been washed and has a new home.
It was a gift for my nephew for his birthday.
Thanks for looking, Click on buttons for other projects.

www.betterofthread.com


Fresh Poppy Design


Sunday, May 22, 2011

The confused quilter...

So this is the quilt that I struggled with from day 1! I started working on this....hmmm, lets see...2 years ago!

The part that is labeled "front" was going to be the front of the quilt then on the right side of it was actually going to be the back. (it was going to be like a runner for my bed) I just wanted to make a quilt to display at the foot of my bed...then I thought that was kind of a dumb idea so I just sewed the front and back together. ??

But then this turned out okay because when I fold it one way you get the pretty lime and blue shades of flowers and if you fold it the other way then you get the pretty patchwork.

And here is the back, the back is actually my favorite. I love the Valorie Wells fabric.  I also made curtains out of this fabric in the turquoise shade.

I can also fold it up and put at the end of my bed with this side showing..although I even like it like this too!
So I guess being confused wasn't that bad after all.
Thanks for looking, click here if you want to see more pictures. Oh and check out these great parties I am linking too...You don't want to miss out on all the inspiration!


sew many waysKeeping It Simple

Sunday, April 3, 2011

I actually finished something!

but this was so cute and easy to do it wasn't too hard to keep going.
I love all the scraps that I used and had the perfect amount left for binding.
You have to check out her blog

I was especially drawn to this project because in my bedroom I have a picture of my daughter on a swing. My daughter is now 13 but in the picture she was around 4.
so cute right? I can't even remember her that little and I feel so lucky that I have a picture like this.


Thanks for looking. I will be participating in these blog parties:
    {Sew} Modern Monday at Canoe Ridge Creations

Keeping It Simple


Sunday, January 16, 2011

not so perfect quilt

so I was working on the finishing steps of my simply pure quilt...
and you can see how great the binding turned out...

I love when the corners turn out perfect (only us quilters would notice that)

So it's beginning to look like a pretty good quilt right? Everything seems to be going my way...
then look....
I will never sew horizontal lines again! but the only reason why i quilted it that way is because my piecing went that ways so I used it as a quide...WRONG thing to do...the fabric just stretch and there was no way I could fix it. The new name for this quilt is "The Wave"

I made this quilt for my friend and it was for her baby shower....so all this wavyness was going on the morning of her shower...I first thought...no way am I going to give it to her, then it occured to me that I would be wasting all the fabric and I'm never going to find another baby named Bronco so I focused on the positive... she would probably love the fact that it said "Bronco" on it...and...she is not a quilter! Maybe she would think the wavyness was a special technique? hahaha. so I gave it to her and everyone loved it. No one noticed the waves! They all just thought it was amazing that I made a quilt!  Oh and that night she went into labor and the next morning Bronco was born!  So it turned out to be such a happy ending.

Friday, December 10, 2010

Done! Complete! Finished!


 Finally! I finished this quilt. The binding is what took me forever. (no reason why)
And for the back I just did a plain navy blue fabric with some piecing in the middle.

And here it is all folded and ready to be wrapped. It's going to be a christmas gift.
Now I have all my christmas shopping done...aside from my husband.
Thanks for looking! I hope everyone is enjoying this holiday season And you have plenty of quilts to keep you warm!


Friday, November 5, 2010

sew n tell

So in an earlier post I was trying to decide how to quilt my pumpkin patch wall hanging, I didn't know what to do for the background.....
 So I went with stippling....
When in doubt...stipple it out.
And now it's complete! 

There are some amazing finishes on Amylouwho's blog this week.
Make sure you check them out!

Friday, October 29, 2010

Bloggers Quilt Festival

I am presenting  Flock O' Geese!
I saw this quilt in Elm Creek Quilts books and had to make one myself! I just love the little triangles. And I made it from some leftover Urban Couture fabrics.

What I learned most is to iron..actually "Press" Press, Press.

I just love the little triangles! And another thing that was helpful is measure 1/4 away from the point. It is very important that you always leave 1/4 alowance or else you will just sew off the tip of the triangles...and again, press-not iron.

I also quilted and binded this myself. What I really wanted to do is straight line quilting but did not know where to run the lines thru so I just did an allover stippling on the long arrm.

The binding is also from the Urban couture line and I did a blind stitch on the back of the binding.
Oh and It's kinda exciting to mention that I entered this is my local County Fair and it won 1st place in it's category.

Thank you so much for taking the time to read about my quilt...Make sure to check out all the others.


Amy's Creative Side - Blogger's Quilt Festival

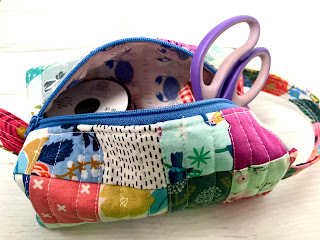
Sewing Scrap Projects! A Quilted Bag.

Don't you just love all this fabric goodness?  In todays episode we will dive into scraps of fabric again! Do you have a fabric stash? I...